
How to Restore Old Photos with AI (Scratches, Fading, Color) in 2026
A practical guide to restoring old prints with AI: how to scan them, what the tools can and cannot fix, which restoration tools are worth trying, and a one-click way to get a repaired, colorized photo in about a minute.
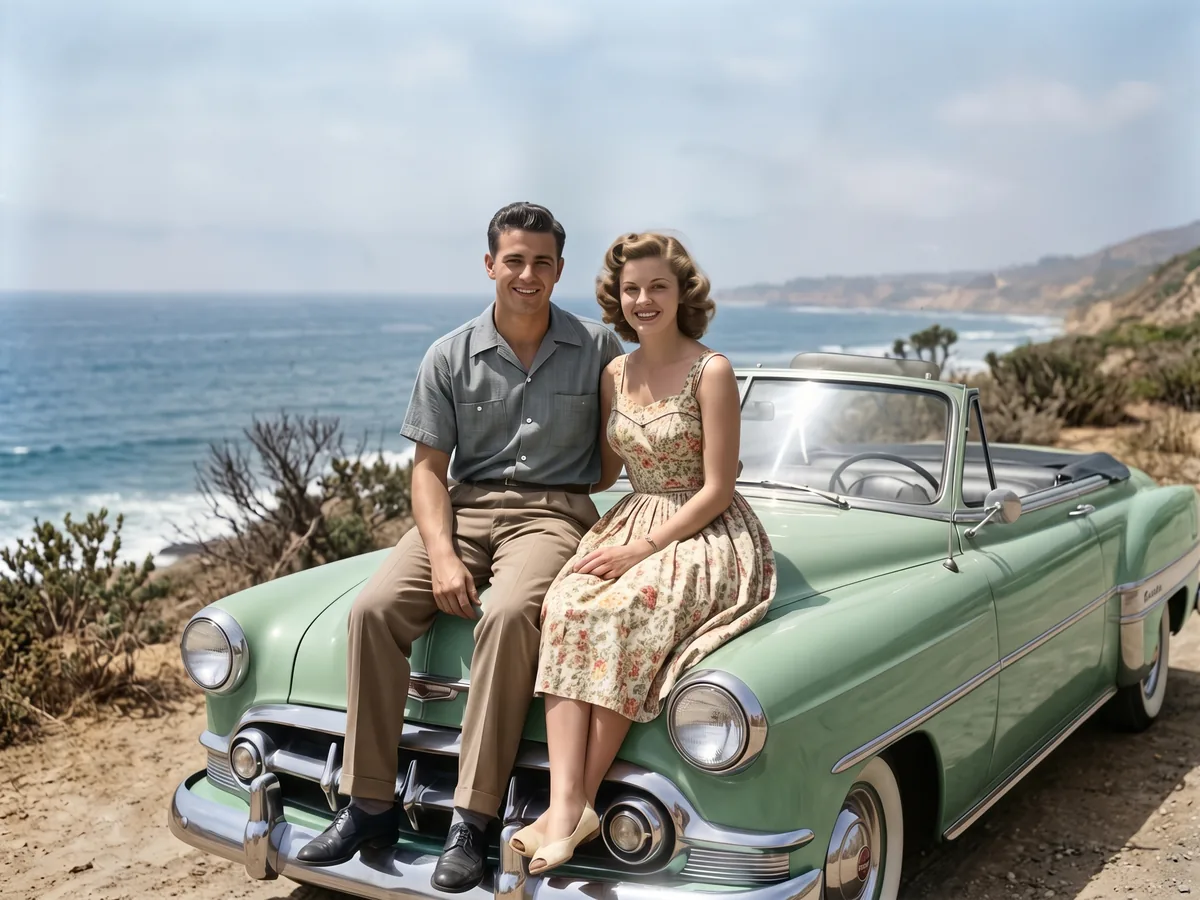
Most families have a shoebox of prints that are fading, creased or stuck to album pages. Five years ago, restoring one meant hours in Photoshop or a paid retoucher. Today an AI restoration tool can remove the damage, sharpen the faces and add natural color in about a minute. This guide covers how to digitize the print, what to expect from the AI, and which tools are worth your time.
What AI restoration can fix
- Physical damage: creases, scratches, tears, stains, dust and water marks.
- Fading and color casts: the yellow or magenta shift of old prints, washed-out contrast.
- Softness: faces that were slightly out of focus or lost detail in a small print.
- Missing color: black-and-white photos colorized with plausible skin, clothing and sky tones.
What it cannot do honestly
- It cannot know the true color of a dress or a car. Colorization is a plausible guess; if the color matters, say so and correct it.
- A large missing area (a torn-off corner with a face in it) is reconstructed from context. Small gaps come back convincingly; big ones are the model's best guess and should be checked before printing.
- It should not change who is in the picture. Good tools keep the same people, poses and composition and never "beautify" a face into someone else. If a restoration makes grandma look like a stock model, use a different tool.
Step 1: Digitize the print properly
The AI can only work with what you give it.
- Flatbed scanner, 300 dpi or more. 600 dpi for small prints you want to enlarge. Turn off the scanner's own "dust removal" and "auto color"; let the AI do that.
- No scanner? Use your phone. Shoot straight on, in even daylight, no flash, no window reflection. Fill the frame with the photo and keep the phone parallel to it.
- Crop out the album page but keep the full print, including damaged borders. The AI uses the undamaged areas to rebuild the damaged ones.
Step 2: Restore it in one click with DREAMMMER
The DREAMMMER photo restorer is a one-click tool: upload the scan and start. The instruction it sends to the model asks for a clean, sharp photograph with creases, scratches, stains and tears removed, missing areas rebuilt, facial detail recovered and natural colorization, while keeping the same people, poses and composition and never zooming or cropping.
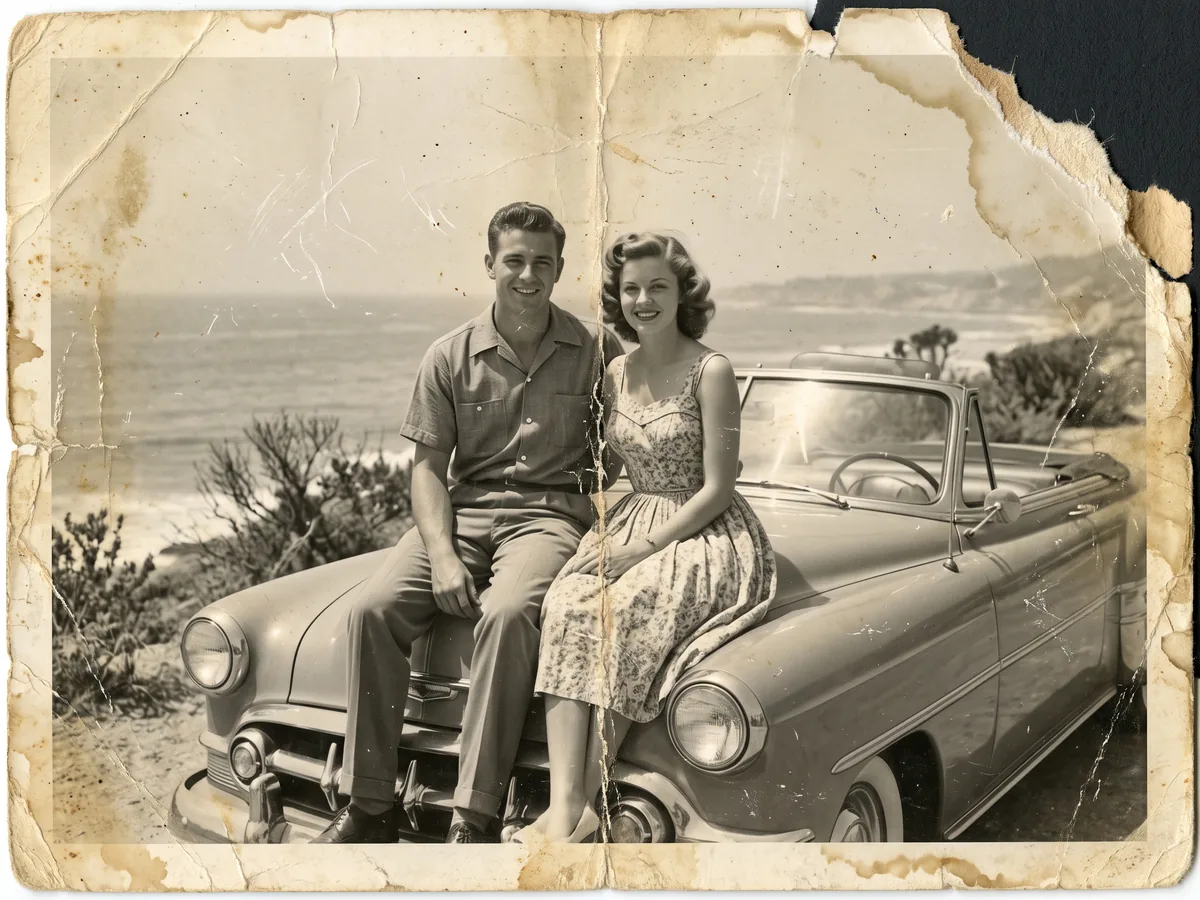
The restored result is the photo at the top of this article. This is the scan it started from:
What to know:
- 7 credits per photo. New accounts start with 50 free credits.
- JPEG, PNG or WebP. Results arrive in about a minute.
- The result opens in a chat with the Agent, which is where restoration gets good: "keep it black and white", "her coat was dark red", "the sky looks too blue", "upscale this for a 20 by 30 print" are each one message.
Step 3: Correct, then enlarge
After the first pass, look at three things:
- Faces. They should look like the same people, just clearer. If a face drifted, ask the Agent to redo it staying closer to the original.
- Colors. Fix anything you know to be wrong. The model guesses; you remember.
- Size. Old prints are small. Run the HD upscaler at 2× or 4× before printing so the detail survives at poster size.
Other restoration tools worth knowing
- Remini. Mobile app known for face enhancement. Very good at sharpening faces; can over-smooth skin, and the app is subscription-based with a trial.
- VanceAI Photo Restorer. A web tool with separate steps for scratch removal, colorization and enlargement, which gives you control but means several passes. Credits-based.
- MyHeritage Photo Enhancer. Built for genealogy; good colorization and animation gimmicks, tied to a MyHeritage subscription.
- Picsart and Fotor. General editors with a restore option; fine for light fading, weaker on heavy damage.
- Photoshop (Neural Filters). The most control if you already own it and know your way around layers.
If you want one upload and one result, with the ability to argue with it afterwards in plain English, DREAMMMER is the simplest of these. If you want granular manual control, Photoshop still wins.
FAQ
Can I keep the photo black and white? Yes. The one-click tool colorizes by default; tell the Agent in the chat to keep it monochrome and it will redo the pass without color.
How much does it cost? 7 credits per photo on DREAMMMER, with 50 free credits for new accounts. Failed generations are refunded automatically.
Will it change the faces? The instruction keeps the same people, poses and composition. It repairs and sharpens rather than generating a new face. Always compare with the original; the chat shows both.
What resolution should I scan at? 300 dpi for ordinary prints, 600 dpi for small ones you plan to enlarge. A straight, well-lit phone photo also works.
Can it fix a torn-off piece? It rebuilds missing areas from the surrounding content. Small gaps are convincing; a large missing region is a guess, so check it before printing.